Use Metalswap to Protect From Volatility
Faucet
To begin your test run, visit the MetalSwap demo interface at https://testnet-linea.metalswap.finance.
This demo operates on the Linea Testnet using two custom fake tokens called: "WBTC" and "USDC". These demo tokens will allow you to simulate operations as if they were real, without the risk of losing actual funds.
The following steps will guide you on how to operate the demo:
Getting the Demo Tokens
- Click on the "Tokens➝ Faucets" button on the top of the page.

- If your wallet is set up on a different chain, a message will appear prompting you to switch networks. Click on "SWITCH NETWORK". This will open your wallet with the Linea network already selected. Confirm and proceed with the request for the test tokens.
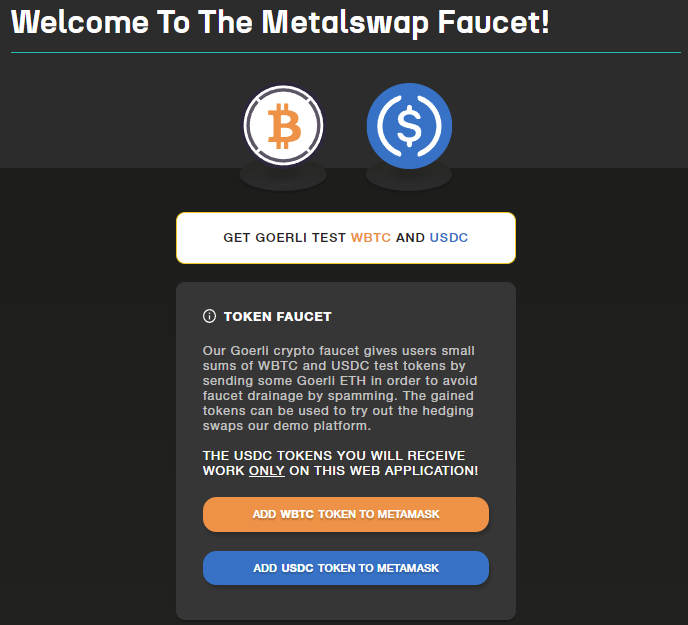
- To add WBTC test and USDC test token info directly to Metamask, you can click on the respective buttons.
We will need at least 0.01 GoerliETH: to avoid the faucet drainage by spamming, a cent of GoerliETH is charged to get the test tokens in change.
After obtaining Goerli ETH tokens, proceed by clicking on the following main boxes:
"Get Linea Test WBTC and USDC", note this operation can be performed once a day.
"Go To The Linea ETH Faucet" to obtain the ETH needed for transition payments.
Once you have obtained the test WBTC and USDC, we can move on "Swap➝ Swap" section to use the Hedging Swap tool.
Hedging Swap
After the MetalSwap Hedging Swap Demo platform opens, proceed to connect your wallet.
Select the Swap section from the menu at the top of the page.

Now, the Demo platform is ready to be used exactly like the real one. To deep dive on how to set up a Hedging Swap, consult the DOCs Hedging Swap ETH V2 and Hedging Swap GOLD V2 sections.
Remember, the demo platform has all the functionalities of the real one. For more information on its functions, refer to the corresponding sections of the DOCs.
MetalSwap Linea Testnet Dashboard
Welcome to the operating interface of MetalSwap on Linea Testnet where financial Hedging Swap Demo Orders can be performed on the Linea Goerli network.
The process of connecting your wallet and setting up the Dapp remains the same as in the real version. Remember to select the Linea Testnet on Metamask before connecting your wallet.
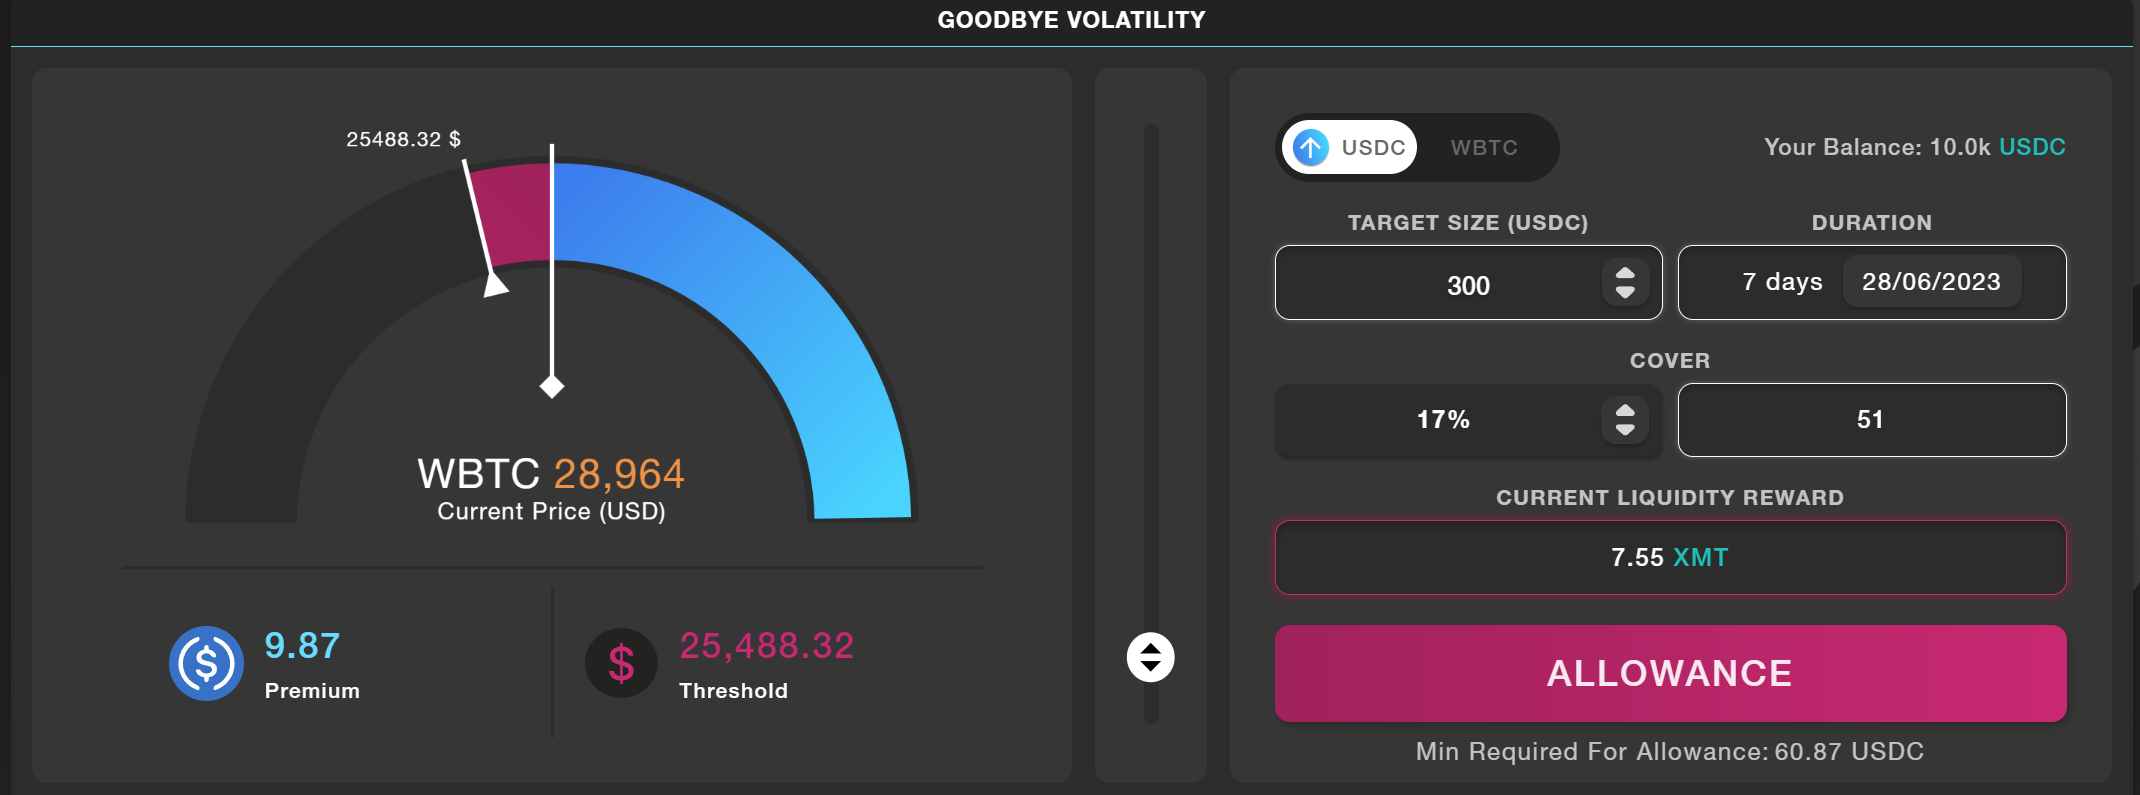
The operating console is also similar to the real one. You will be able to select the type of digital assets to trade with. In this demo, we'll be using the only asset of WBTCtest as "Current Coin".
After the Allowance permission is given, we'll be ready to set our New Swap variables.
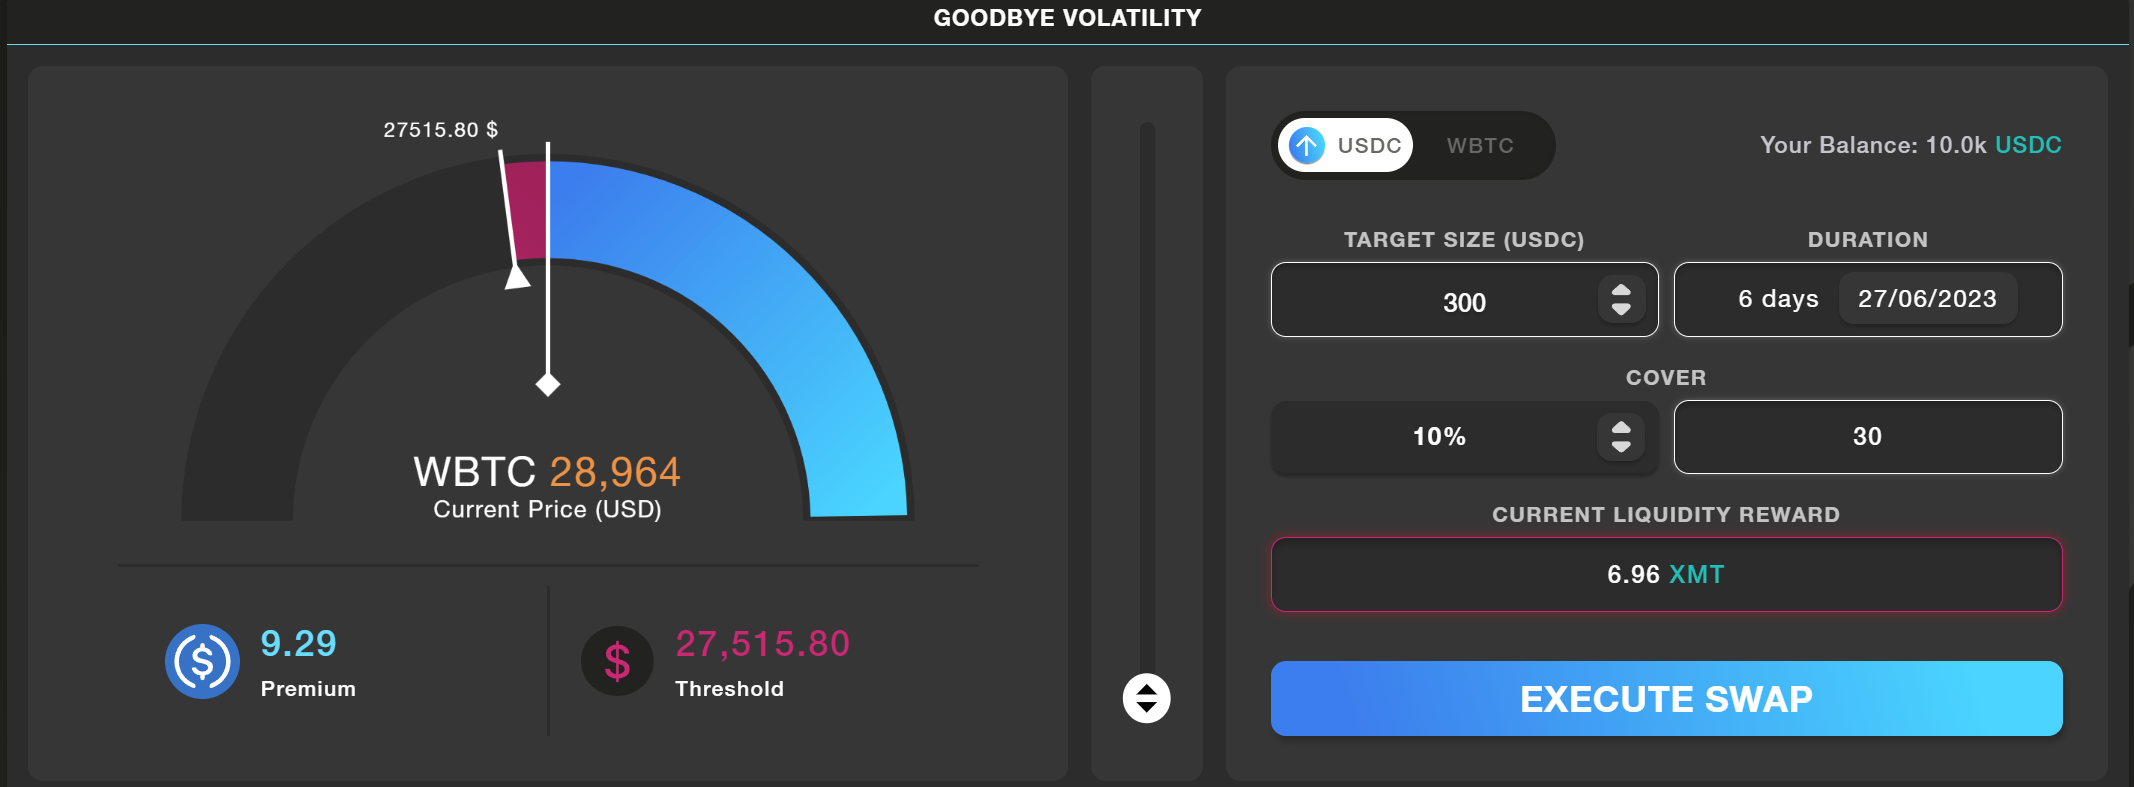
In the following screenshot we'll hedge against the raise of WBTC price by clicking the "Up Arrow USDC" switch, setting variables as follows: Target Size of 300 USDC, 6-days Duration, 10% (the minimum possible) Cover that will be eroded in the case the price goes in the down direction.
Don't forget: the whole Cover eroded brings to immediate liquidation!
So we're paying 9.29 USDC as a Premium to open the new Hedging Swap, plus 30 USDC as Cover as said, plus the common tx fees.
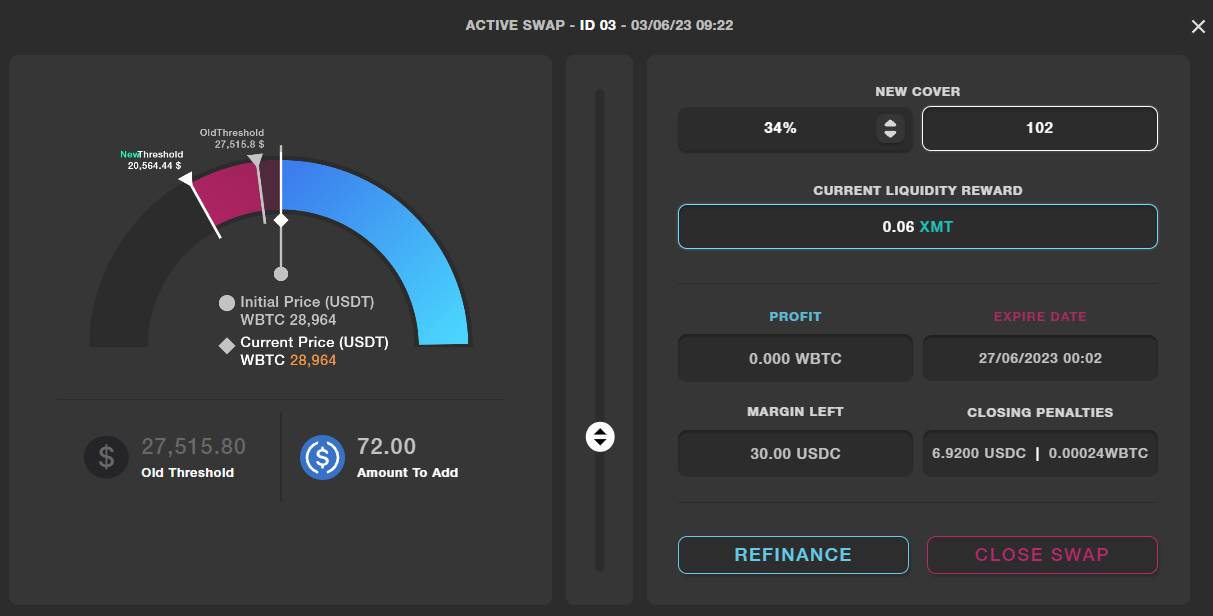
The "Current Active Swap" section at the bottom of the page will display all the active swaps. You can view all non-active swaps by clicking on "History" in the main menu.

To manage an active Swap, click on it to view data relating to its position. For instance, if you wish to increase the Cover, raise the desired percentage with the cursor and click on the "Refinance" button to confirm. To close the Swap early, click on the "Close Swap" button.
NFT Liquidity Providing
To access the service, simply click on Liquidity Pools in the top menu
How to use MetalSwap’s Liquidity Pools
With the Create New Position button, we will provide liquidity ( WBTC test or USDC test )
to those who wish to open a new Swap using MetalSwap's Hedging Dapp.
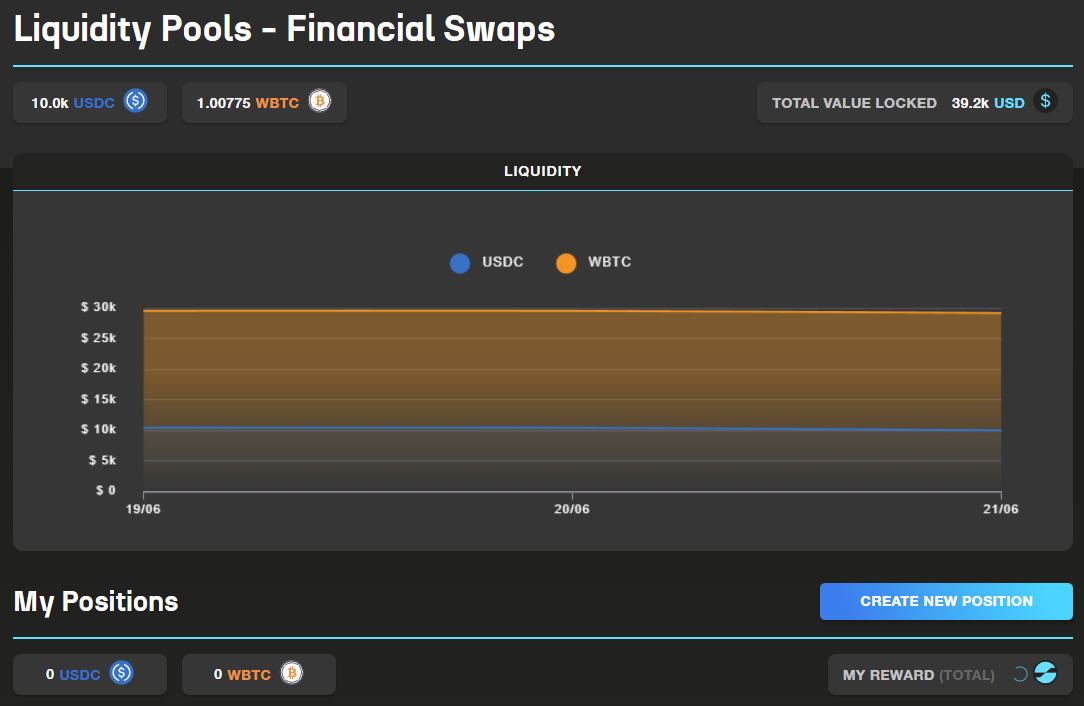
Select the token desired and the amount of Liquidity to Provide

Click on the Allowance button to grant permission to the Smart Contract
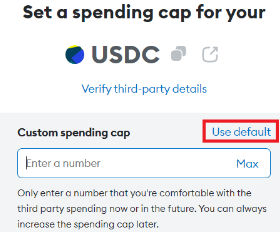
Important to know
MetaMask now requires you to set your spending cap, which is the number of tokens you're comfortable with the Smart Contract spending now or in the future.
- To avoid repeating this process, it is recommended to click on "USE DEFAULT" button. This ensures that you won't have to give an additional allowance when the previously entered number has been reached.
- Enter the desired value for your spending cap.
- Click on "NEXT" to proceed.
- Pay the transaction fee associated with the confirmation.
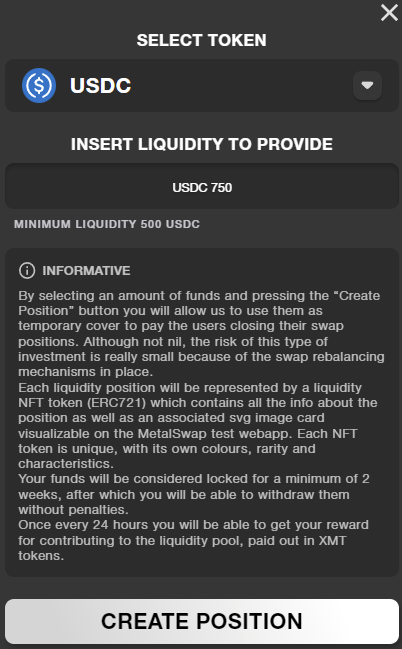
Please remember that there is a minimum liquidity requirement.
Enter the amount of liquidity you wish to provide and click on Create Position.
Now is possible to see the Liquidity Providing NFT appear in the MY POSITIONS section.
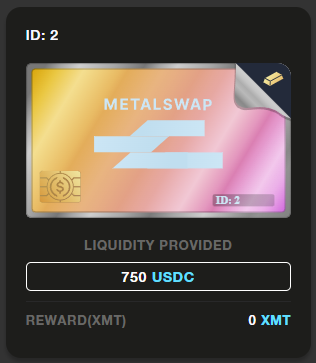
This NFTs is representing the liquidity locked in MetalSwap’s platform and will collect rewards over time.
MetalSwap’s NFTs are unique digital assets that are minted using a combination of pseudo-random data from various sources, such as the address of the user, the NFT's ID, the creation timestamp, the liquidity provided, the block height, and the difficulty.
By clicking on it, the following card will appear, with these commands available:
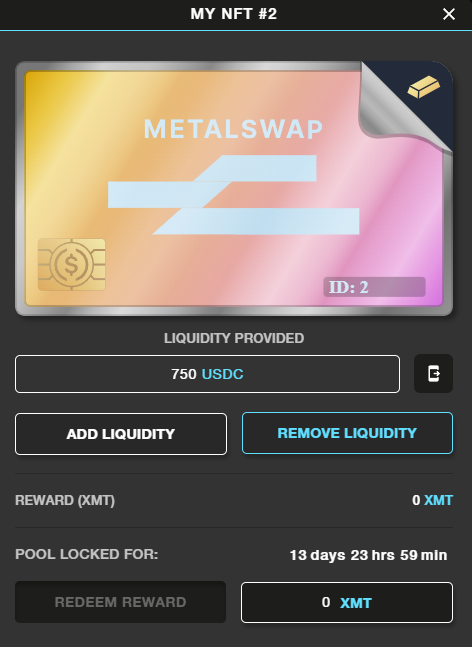
Redeem Reward button. You are allow to get your rewards after a minimum 24H from the deposit.
Add or Remove liquidity button.
Transfer NFT: allows you to transfer the NFT‘s ownership to another public address directly from here!
To learn more about specific details related to these operations, we recommend consulting the following documents: